Showing posts with label gluten-free. Show all posts

Monday, January 9, 2012

Secret squash energy bars (Still Baking #9)

Okay, so this morning I got up with the Emperor and sat down to eat breakfast with him. Upon seeing leftover scone on his plate, his lip began trembling. Yes! Really! He gave me a 2 year old lip tremble! "Mommy, I don't want a scone for breakfast. I want a bar. Remember, we made bars? I want a bar."

And for the briefest glimmer of a moment, I felt like super mean mom as I informed him that we did not have any bars and he would be forced to eat a scone instead. Then I came to my senses and remembered that if it were just Josh at home with him, he'd be eating slices of dried mango and rice cakes for breakfast and that he is by no means underprivileged because he had to eat a SCONE of all things for breakfast!

But I *did* take it as an excuse to make more energy bars tonight after he went to bed. I played around with the ingredients enough that I want to record them again. I'm not going to write out the steps because they're basically the same as for the cranberry chocolate chip energy bars I posted last week.

More energy bars

GF Chocolate-cranberry energy bars... with secret squash!
makes 12 smallish bars

1c oats (regular)
1c steel cut oats (because I accidentally bought these when I meant to buy more normal oats!)
1/4c almond meal
2 tbsps soy flour
4 tbsps quinoa flour
1 tsp baking powder
1/2 tsp salt
1/4c chocolate chips
1/2c dried cranberries
1 tsp cinnamon

1/2c peanut butter
1/4c agave nectar
1 1/4c canned butternut squash (or pumpkin)
------------------

I cut out the dry sugar because I thought they were too sweet last time. And I had half a can of butternut squash left after making the Oh She Glows butternut squash mac'n'cheeze (which is phenomenal! even the Emperor liked it!) for dinner tonight so I figured what the hey, might as well use that as our binder. Just a couple of other little tweaks... these are cooling right now so we'll see how I like them vs the last batch tomorrow. The uncooked batter tasted better though.

Sad to say, I didn't get to spend much time with the Emperor today... I got home late after a doctor appointment and he had to go to bed somewhat early after a busy day of preschool. So about the only time I got to spend with him was pre-bedtime prep-- book reading and tooth brushing. So today's picture is more tooth brushing:

Yet more dental hygiene

Thursday, January 5, 2012

Tapioca Macaroon Pie (Still Baking #5)

Today wasn't great for me. I was just very glum all day, didn't do much of consequence, felt physically crummy towards the end of the day. It was definitely a day where I needed a pick me up.

So naturally... I made pie!

I have to tell you that the photographs of this pie are really horrid, and I know that. But it is SO GOOD that I hope you'll consider giving it a try anyway. The crust is a variation on this one I found on Eat the Cookie. Oh man, I found that blog from random googling and I am SO excited to browse through it now-- though not a solely vegan blog, it looks like it has a ton of vegan yummies.

Tapioca macaroon pie

Tapioca Macaroon Pie
makes 1 9" pie

Macaroon crust:
1/4c soy-free Earth Balance (or your choice of vegan butter)
3 tbsps agave nectar
1 tsp vanilla
1/2 tsp lemon extract
1c finely shredded unsweetened coconut
1c almond meal
1/2 tsp baking powder
1/4 tsp salt


Tapioca filling:
1 can full-fat coconut milk
1/4c water
3 tbsps tapioca pearls
3 tbsps tapioca flour
1/2c finely shredded unsweetened coconut
pinch of salt
1/4c sugar
1 tsp vanilla

1. First make the crust: preheat the oven to 350F and lightly grease a 9" pie plate.
2. Place Earth Balance & agave nectar in small saucepan over low heat and cook, whisking occasionally, until EB is melted.
3. While EB/agave combo cooks, mix together the dry ingredients (coconut, almond meal, baking powder, salt) in a mixing bowl.
4. When EB is melted, remove pan from heat and whisk in the vanilla and lemon extracts.
5. Pour the liquid in the bowl of dry ingredients and use a spatula to mix well.
6. Press mixture into a thin, even layer in your pie plate.
7. Cook for 14 minutes or until crust is a light, toasty brown and smells amazing.
8. Cool for about an hour.

9. While the crust is cooling, make the tapioca filling: combine all ingredients except vanilla in a saucepan and allow to soak (to soften tapioca) for at least 30 minutes.
10. Heat over medium-low heat until bubbling. It will thicken VERY quickly-- mine started to get pretty thick before it even started to bubble.
11. Once bubbling, cook for about 3 more minutes, stirring constantly. Taste for doneness (who wants undercooked tapioca?) and provided it's not crunchy, remove from heat.
12. Whisk in your vanilla extract.

13. Pour tapioca filling into macaroon crust, smooth down with spatula, and put the whole thing in the fridge to set for at least 30 minutes.

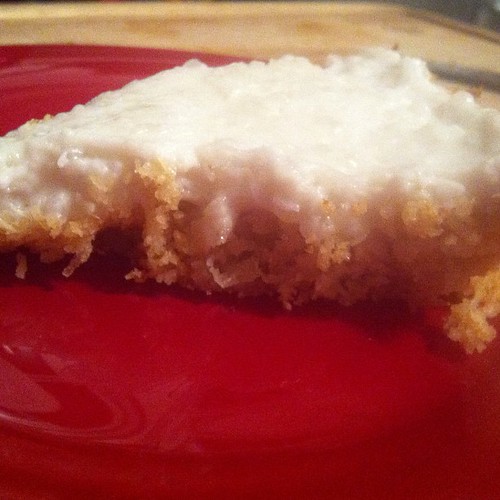
Here's another picture of a single slice of this:

Slice of pie

Ugh, SO good. Why have I never put tapioca in pie before?! I think this would be extra great with a layer of citrus curd in there somewhere-- perhaps a very thin layer between crust and tapioca. It's really tasty as is, though.

Finally, here's your daily Emperor. He's looking very serious while eating his dinner:

Thoughtful dinner

Wednesday, January 4, 2012

Three Corn Casserole (Still Baking #4)

Today I had my first day of maternity leave, and it was blissful. I still woke up at 4:30 a.m. (oops) but lazed on the couch for a few hours afterwards, had a good snuggle with the Emperor, helped him get ready for preschool, went downtown and had a long leisurely coffee and did a bit of knitting, walked for an hour and ended up somewhere in SC I've never been before (Neary Lagoon, a beautiful little wildlife preserve/park), ate a bagel, and went to the farmer's market. At the market, I ran into my friends Amey and Sophia, which was a great surprise! It made a good day even better.

I mentioned that I was buying a few things (no spoilers!) at the market to use in this month's theme and Amey was surprised-- she said she thought I'd be doing all breads and cookies. Ha! Tempting! But I'm baking a few non-sweeties this month too, including tonight's dinner.

This is something I just slapped together but it turned out really well, so I'm going to post the recipe. It owes an inspirational debt to the tortilla casserole recipe in Viva Vegan by Terry Hope Romero, one of my all time favorite cookbooks. I made that tortilla casserole many many moons ago and have thought of it many many times since... this is sort of like a lazier, cornier version of it with stuff I had on hand.

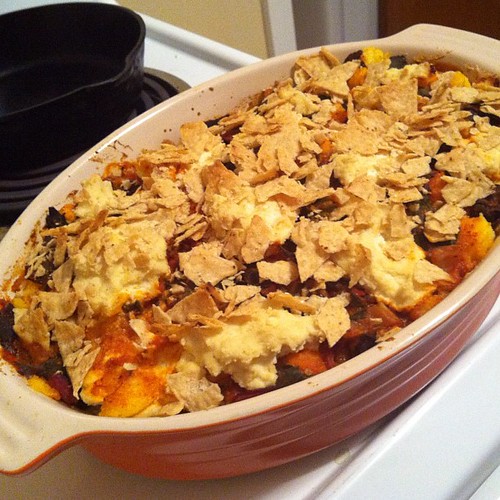
3 corn casserole

Three Corn Casserole
Serves 6-8

1c prepared enchilada sauce
1c leftover spaghetti sauce
(or another combo of red sauces, it doesn't really matter)
1 bunch swiss chard, chopped

1 batch cashew ricotta from Veganomicon
(or 2c of your favorite tofu/nut ricotta)

6 small corn tortillas
1 tube prepared polenta
1/2c coarsely crushed tortilla chips

1. Preheat oven to 375F and get out a large baking dish (I used a large oval dish, but your standard 9x13 should work here as well).
1. Combine your sauces and swiss chard in a saucepan over medium heat and bring to a simmer.
2. Simmer til swiss chard is tender and sauces are combined, about 5 minutes.
3. Remove sauce from heat.
4. Spoon about 1/2c of your sauce into bottom of baking dish.
5. Lay down 2 of the corn tortillas.
6. Spread a layer of cashew ricotta over the tortillas.
7. Crumble a layer of polenta on top of the ricotta.
8. Pour another 1/2c of sauce over the polenta layer.
9. Repeat steps 5-8 til you run out of sauce. You should have some cashew ricotta leftover at this point.
10. Cover baking dish with tinfoil and bake for 20 minutes.
11. Pull dish out and plop on the remaining ricotta by the small spoonful.
12. Sprinkle crushed chips over the top of the dish.
13. Bake for another 15 minutes.

Et voila! Lazy but tasty (and extraordinarily filling) tortilla casserole. We all really enjoyed it-- even the Emperor, who generally will not eat anything where the ingredients are mixed together like this but made an exception for a dish that contained tofu, polenta, tortillas, AND tortilla chips-- and have a ton leftover to put in the freezer for baby time. My only regret is the sauce... I wish I'd bought enough enchilada sauce to use that entirely instead of having to cut it with the spaghetti sauce, which was fine but reduced the flavor overall.

The Emperor did still ask for snack before bed (a demand we almost never acquiesce to; my general feeling is that he should eat enough at dinner to not be hungry again before bed) and since he had eaten a legit amount of dinner, he did get a cookie. Here he is enjoying it:

Eating a cookie

Monday, January 2, 2012

Gluten-free chocolate-cranberry energy bars (Still Baking #2)

Hey! You know what I haven't posted in a while? A recipe for something! I'm going to change that today with an easy energy bar recipe. This is based on a recipe in Sarah Matheny's Peas and Thank You. I de-glutenized it and added a few tweaks of my own, but if you like it, I recommend checking out her book... which has another super yummy (and already GF) energy bar recipe I keep meaning to try.

Energy bars

Here's my version, in any case:

GF Chocolate-cranberry energy bars
makes 12 smallish bars

3 tbsp ground flax seed
6 tbsps water

2c oats
1/4c almond meal
3 tbsps soy flour
3 tbsps quinoa flour
1 tsp baking powder
1/2 tsp salt
1/4c sugar
1/4c chocolate chips
1/2c dried cranberries

6 tbsps peanut butter
2 tbsps tahini
1/4c agave nectar

1. Preheat oven to 375 and line a 9x9 baking dish with parchment paper. (Or spray if you want to. I like parchment paper because I am so lazy.)
2. Mix together flax and water in a small bowl and set aside to get good and gooey.
3. Put all the dry ingredients (oats, almond meal, soy flour, quinoa flour, baking powder, salt, sugar, chocolate chips, cranberries) in a large bowl and stir well to combine.
4. Dump flax-water mixture, peanut butter, tahini, and agave in on top of dry ingredients and mix vigorously.
5. Spread out the mixture (which will be ugly as sin) in your baking dish.
6. Bake for 15 minutes, then allow to cool for at least another 15 before digging in.

And that's it! You know how I am always hating on quinoa flour and how it tastes so quinoa-y. You actually can't taste it in this recipe. Must be hidden under all the other deliciousness.

I do think these came out a touch too sweet. I had already decreased the sweetener slightly from the P&TY recipe but would go further next time-- maybe cut out the dry sugar entirely and see how they hold up with just the agave. The cranberries and the chocolate chips make these sweet enough already.

We used up the end of the peanut butter making these, and the Emperor asked if he could have a taste of the PB so I just gave him the jar and a spoon, figuring he'd give up pretty soon after realizing there wasn't much left to scoop up. But he really went to town making sure he got every bit of peanut butter he could get out of that jar... here he is fishing for more:

Peanut butter problem

Obviously peanut butter is very serious business.

Wednesday, December 14, 2011

Cara's Nog Cookies! (Celebration #14)

For today's celebration, I baked up a huge batch of gluten-free eggnog cookies based on the recipe that featured in Fork and Beans 12 days of Cookiemas. Since I didn't have the pre-mixed baking mix that she recommends, I ended up having to play around with the recipe quite a bit, but I'm really happy with the end result so I'm posting it here!

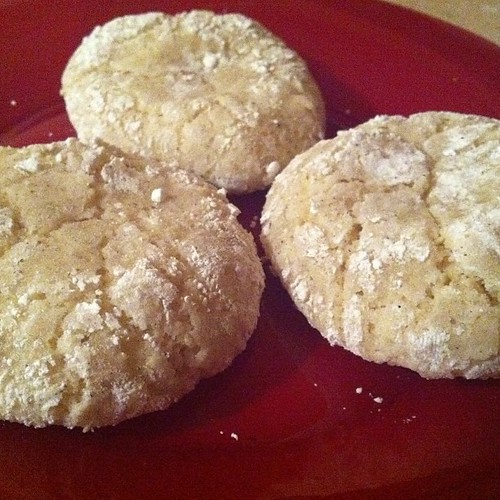
Cara's Nog Cookies

Cara's Nog Cookies
makes about 5 dozen

Gluten-free flour mix (based on one I saw on the PPK earlier):
1 1/2 c white rice flour
1/2 c coconut flour
1/2 c almond meal
1 c GF oat flour
3/4 c tapioca flour
2 tsps xanthan gum
1 tsp baking powder

3/4 c Earth Balance
1/4 c coconut oil
2 c sugar
1 c non-dairy nog (I used Silk's soy nog)
1 tsp nutmeg, or to taste
1/2 tsp cardamom

For rolling:
powdered sugar
more nutmeg
more cardamom

1. Preheat oven to 350F and line a couple of baking sheets with parchment paper.
2. Mix together all of the flour mix ingredients and set aside.
3. Cream together Earth Balance, coconut oil, and sugar, adding a little of the nog if it does not seem to be creaming on its own.
4. Beat in the nog.
5. Mix in the nutmeg & cardamom; taste to make sure your cookies taste noggy enough.
6. When liquid ingredients are spiced to your liking, dump flour in and mix til just combined.
7. Fill wide shallow dish with powdered sugar & some more spices.
8. Drop cookies by the spoonful into powdered sugar, then use your fingertips to gently roll them into balls.
9. Place balls on prepared cookie sheets and press gently in the center of each one with your thumb to flatten slightly.
10. Bake at 350F for 16 minutes, then allow to cool on cookie sheets for at least 10 minutes before moving to wire cooling racks.

I have no idea what's in the Authentic Foods GF baking mix, but I think it must be very different than mine... I had to bake hotter AND longer to get these to a point where they'd ever be cooked all the way through. My first batch came out really bizarrely squidgy (fortunately it was only the first dozen... out of five) and I played from there til I got it right for this particular mix of flours. Oh gluten free baking! You are an exciting new adventure!

Flavorwise, I love these. They're really good. Super noggy and yummers. I am SO GLAD I didn't use quinoa flour because yeah, they don't have that quinoa flour bitterness that I hate so much.

The Emperor was not a super great helper with these (he mixed a little, but actually told me it was my turn to mix again... not something he usually ever does) but once they were baked, really, really, really loved these. He ate four... of the squidgy first batch. He probably would have begged for more but then it was bedtime.

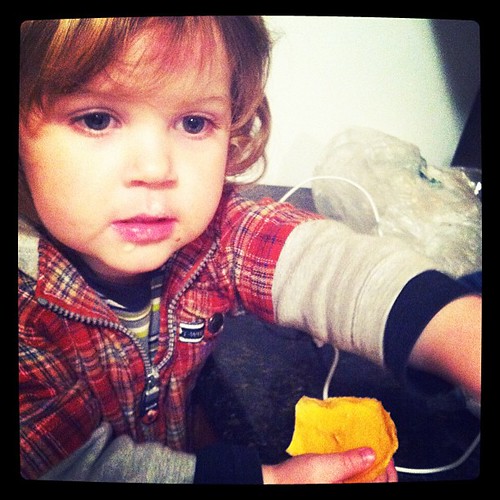
Here he is idly mixing. You can see that his heart wasn't in it today! I wish I had gotten a picture of him enjoying the cookies instead but there you go...

Weary boy